
Puntadas de bordado para principiantes + muestra de bordado a mano de cactus gratis para aprender lo básico
El bordado a mano es un oficio antiguo que se convirtió en un pasatiempo moderno popular. Es una actividad divertida y relajante que beneficia tu salud mental y una habilidad práctica que te permite crear arte textil, remendar y embellecer tus prendas, o crear textiles y regalos originales para el hogar.
¿Quieres aprender a bordar a mano? Este tutorial de bordado a mano te guiará paso a paso mientras aprendes puntadas de bordado para principiantes y coses una divertida muestra con un cactus abstracto en la escena del desierto. ¡Descarga un patrón PDF gratuito de Cactus y aprende puntadas de bordado para principiantes hoy!

Inicio del proyecto de bordado a mano
Antes de lanzarte a aprender puntadas de bordado para principiantes, aquí hay algunas cosas que debes preparar:
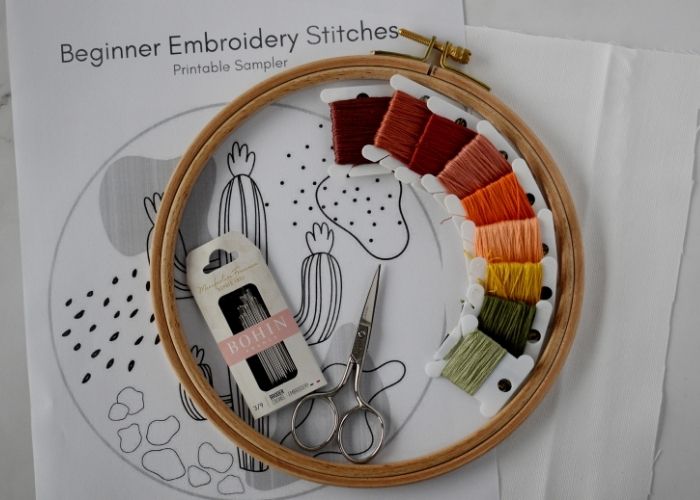
- Gather tools and materials. You will need a fabric, embroidery floss, a hoop, an embroidery needle, and small scissors. Head to the Hand Embroidery Supplies page on this blog for the list of tools and materials I use and recommend.
- Decide on the pattern transfer method you want to use. If you plan to embroider on light-colored fabric, the lightbox method with a friction pen is the most simple and affordable method that I use the most. Read the article “How To Trace Pattern on Fabric: Five Methods For Fast And Easy Embroidery Pattern Transfer” to learn how to choose the best fitting method and what materials you will need for it.
- If you are an absolute beginner, I recommend reading the article Hand Embroidery Basics: A Beginner’s Guide to Needlework before you dive into your first stitching project.
- Planifique con anticipación. ¿Enmarcará su muestrario terminado en un aro para la decoración de la pared? ¿O quieres convertirlo en una funda de almohada o en una bolsa de mano? Corta la tela en consecuencia, dejando suficiente material para el proyecto que quieras hacer más adelante.
Puntadas de bordado para principiantes
Para que el aprendizaje de las puntadas de bordado para principiantes sea divertido y dinámico, he incluido nueve técnicas de bordado a mano que puedes utilizar para contornos, rellenos y decoraciones.
Pespunte

Backstitch is the most basic embroidery technique for outlines, lettering, sewing, and filling. Small, straight stitches create fluid lines that can be embroidered straight or curved.
Puntada de tallo

Stem Stitch is another hand embroidery technique suitable for beginners and widely used in hand embroidery. This stitch creates a fluid line and is used for outlines, lettering, or filling. This stitch is indispensable in botanical embroidery.
Pespunte dividido

Split Backstitch is a variation of the Backstitch that creates smooth lines. This beginner-friendly technique is widely used for outlines, lettering, and as a base for filling stitches. In this Cactus sampler embroidery project, we will use Split Backstitch as an outline stitch and as a base for Satin Stitch and Long and Short stitch.
Cadeneta

Chain Stitch is a very decorative yet simple hand embroidery technique every beginner should learn. Small loops connected into a line create a decorative line, letters, or embellishments. You can use this stitch for borders, outlines, or filling.
Punto de cadeneta separado

Detached Chain Stitch is another beginner-friendly embroidery stitch that has multiple uses. With this stitch, you can add decorative accents to your embroidery project, fill it, create lines, or mix it with other stitches to make complex decorative bands.
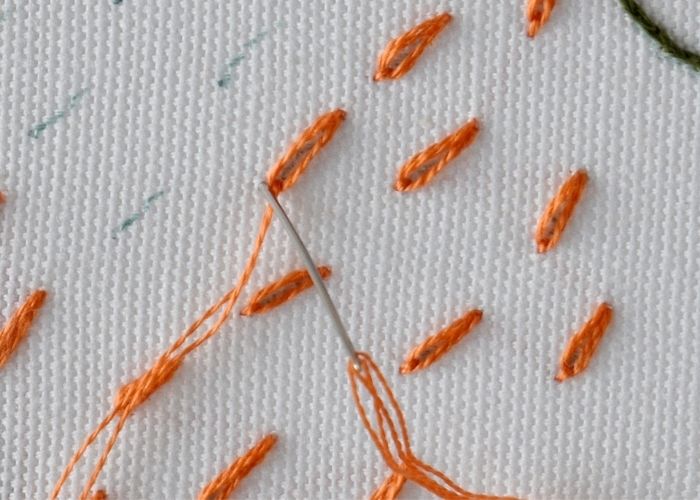
Punto de semilla

Seed Stitch is the most straightforward filling technique you can learn fast and use for various projects. This simple embroidery technique will surprise you with all its creative possibilities. Even if the method is straightforward, it has loads of options for personalization and variations – from length and colors to density and texture.
Nudos franceses

French Knot Stitch is a textural decorative hand embroidery technique. It has many uses – from filling areas and accent stitches to being a part of complex composite stitches.
Este punto tiene fama de ser difícil, pero no temas. Sigue estos sencillos consejos y te encantarán los nudos franceses como a mí:
- Usa ambas manos para hacer este punto.
- Envuelva el hilo alrededor de la aguja 2 veces (3 veces es el máximo). Si necesitas un nudo más grande, usa un hilo más grueso o más hebras.
- Deja un pequeño espacio entre el comienzo de la puntada y el lugar donde llevas la aguja hacia abajo en la tela. El nudo no saldrá a la parte posterior del material.
- Tira del hilo lentamente a través de las envolturas hasta la parte posterior de la tela. Además, mantenga el hilo de trabajo bajo tensión hasta el último momento posible cuando pase a la parte posterior del paño.
- Usa una aguja de sombrerería en lugar de una aguja de bordar. Tiene un ojo del mismo grosor que el eje, por lo que es fácil pasar la aguja a través de las envolturas apretadas sin que se enganche en el ojo.
Punto de satén

Satin Stitch is a popular filling technique that beginners should learn. You will find this stitch in many embroidery patterns and projects. Therefore, you should learn it at the beginning of your stitching journey. Satin Stitch is widely used but has a reputation for being a complex stitch.
Aquí hay algunos consejos para una puntada de satén suave:
- Los hilos más delgados (o hebras simples) funcionan mejor que los hilos más gruesos.
- La tela de suelo con un conteo alto y un tejido firme y completo funcionará mejor.
- Manténgalo pequeño; No trates de rellenar áreas extensas con este punto.
- Al bordar, comience el punto de satén en el medio y muévase hacia los lados del diseño.
- Para bordes más hermosos, delinea la forma primero (usaremos Punto de Espalda Dividido para los contornos).
Puntada larga y corta

La puntada larga y corta, también conocida como pintura con hilo, es una técnica de bordado a mano para el relleno que cubre completamente la tela. Esta puntada de bordado a mano es popular y se usa ampliamente en diferentes estilos de bordado. La técnica de pintura con hilo es popular en el bordado moderno a mano alzada para sombrear pétalos de flores, pájaros y animales. En la tripulación jacobea, los elementos botánicos más grandes, como ramas y animales, se representan con esta puntada.
Read the article “Long and Short Stitch for Round Shapes. Learn how to Embroider a Sphere and a Circle” for additional guidance on the Long and Short Stitch.
Proyecto de bordado a mano para aprender puntadas de bordado para principiantes

Cactus: muestra de bordado a mano
Peajes y materiales
- Tejido. Usé una mezcla de lino blanco y algodón.
- Un aro. El mío mide 18 cm.
- Hilo de bordar. Utilicé hilo de bordar DMC.
- Agujas de bordar.
- Tijeras.
- Bolígrafo de fricción para la transferencia de patrones.
Step-by-step hand embroidery tutorial
- Gather tools and materials
Download and print the Cactus PDF pattern. Choose colors for the project.
- Transfer the pattern to the fabric
I used a Lightbox method and a friction pen, but you can choose any method you prefer.
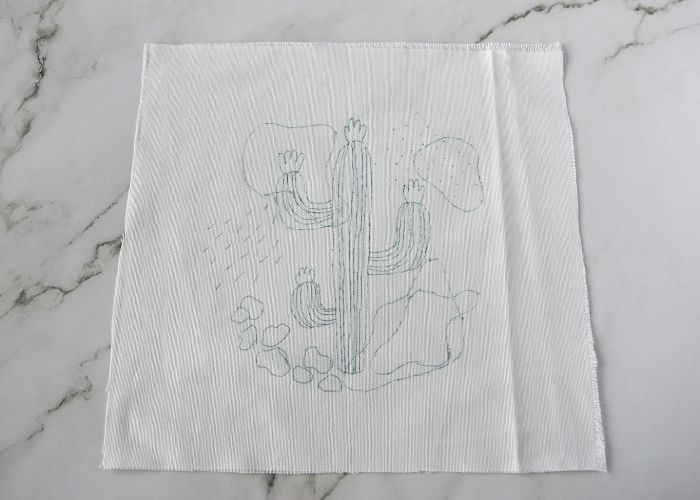
- Frame the fabric in a hoop
Adjust the tension and tighten the tensions screw. You can use a hoop stand for stability and the possibility to use both hands for stitching.

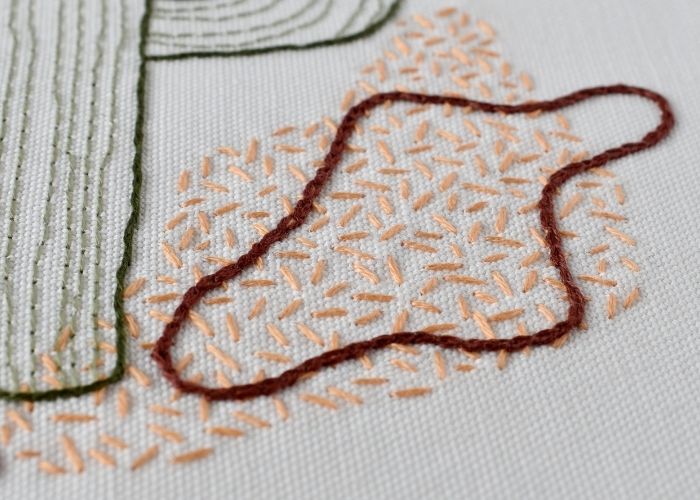
- Seed Stitch filling
Use two strands of embroidery floss and fill the shape with small straight stitches in random directions.
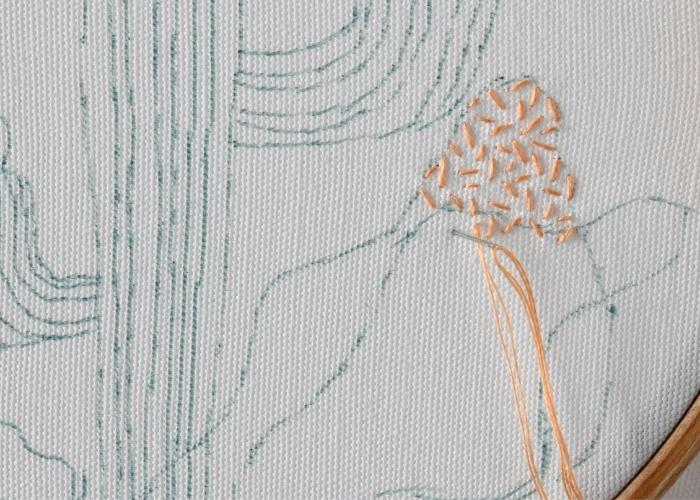
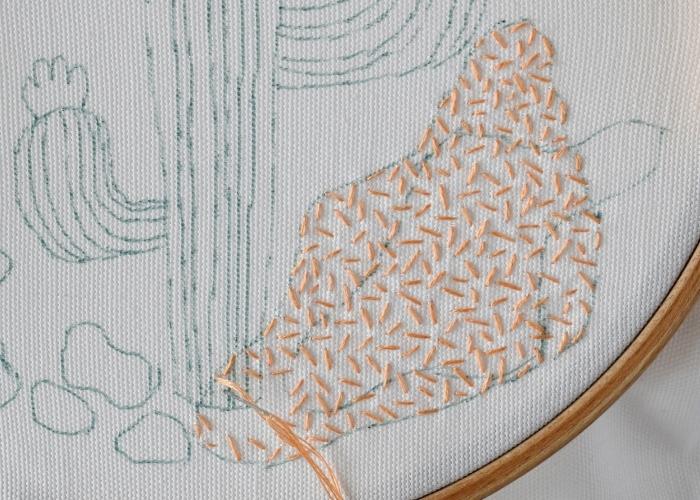
- Keep the same size
As you move, filling the shape, try to keep the stitches of a similar size and maintain the same density throughout the shape.
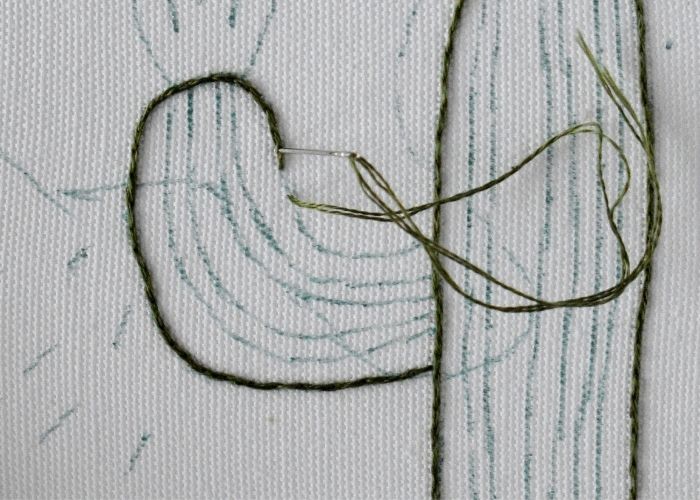
- Chain Stitch
Outline the shape with a Chain Stitch. Make small stitches as they follow the curves better.
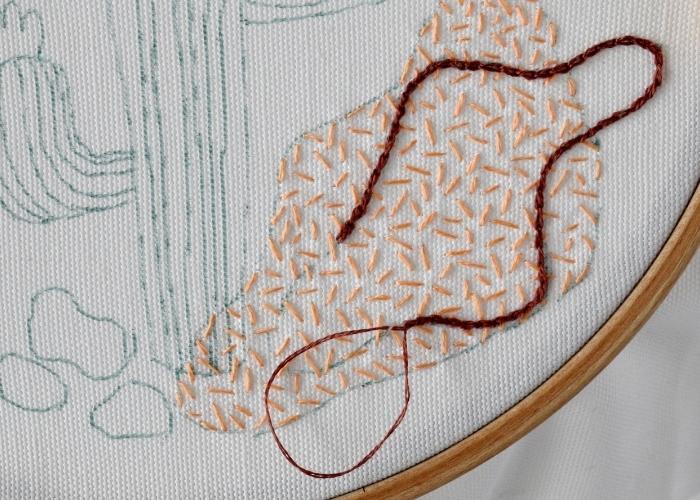
- Close the shape
To make a nice finish to the shape, connect the last stitch to the first one in an invisible circle. Watch a video lesson, “Chain Stitch Mastery: Unlock Secrets of Chain Stitch Hand Embroidery!” for more tips on Chain Stitch embroidery.
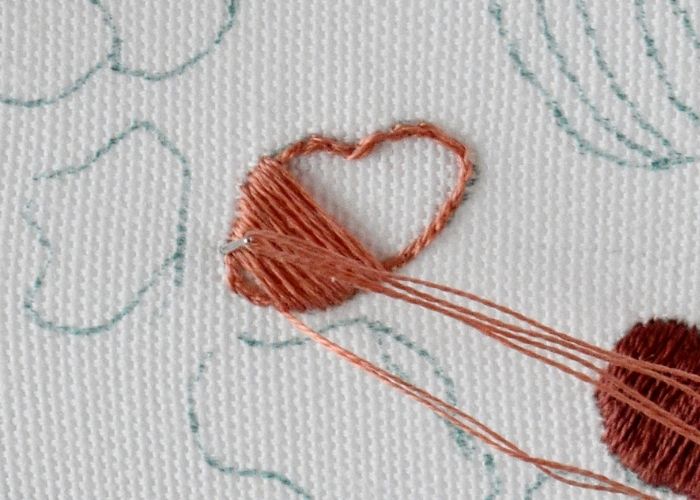
- Satin Stitch – outline
To make a Satin Stitch with a neat border, first outline the shape with a Split Backstitch.
- Satin Stitch – filling
Start filling from the center of the shape. Keep all the stitches parallel to the first one.
- Satin Stitch – filling
First, fill one side of the shape.
- Satin Stitch – filling
Then, return to the shape’s center and fill the design’s second part.
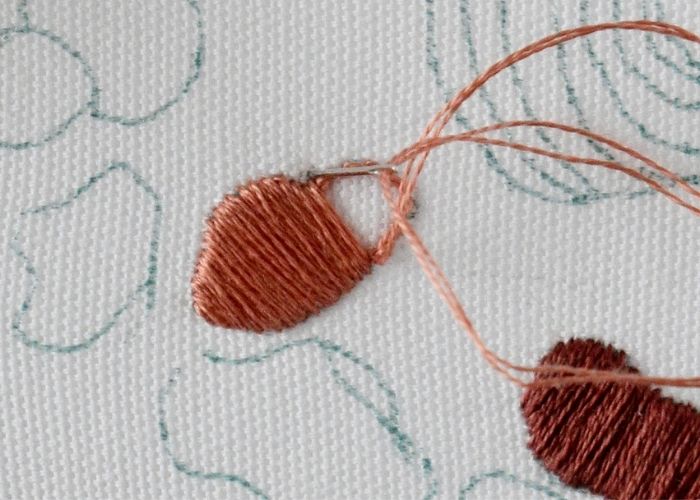
- Split Backstitch
After you fill some pebbles with Satin Stitch, outline others with a Split Backstitch.

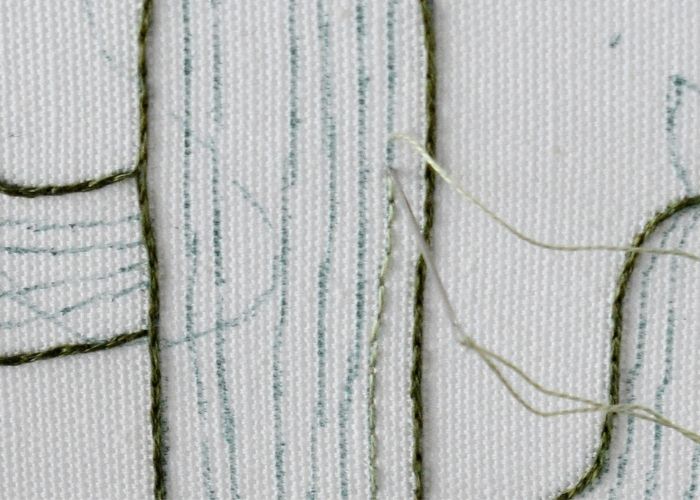
- Outline the Cactus
Use a Split Backstitch to outline the shape of the Cactus plant. Start with the central part.
- Outline the branches
Use the same Split Backstitch to outline the branches of the Cactus.
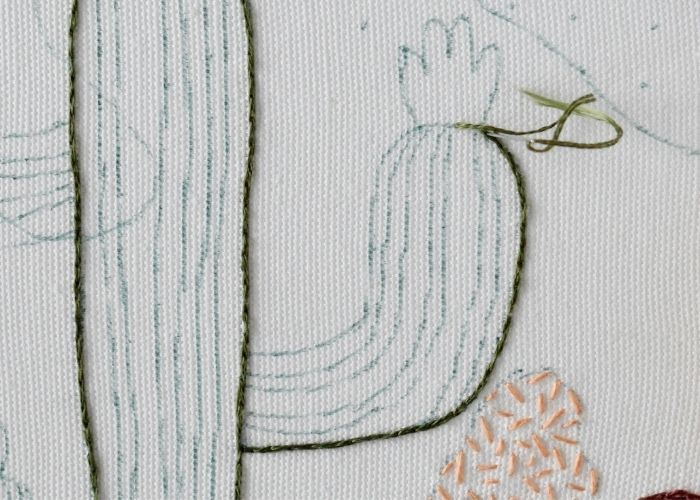
- Finish outline
On the curves, make your stitches slightly shorter; this way, the curves will look smoother.
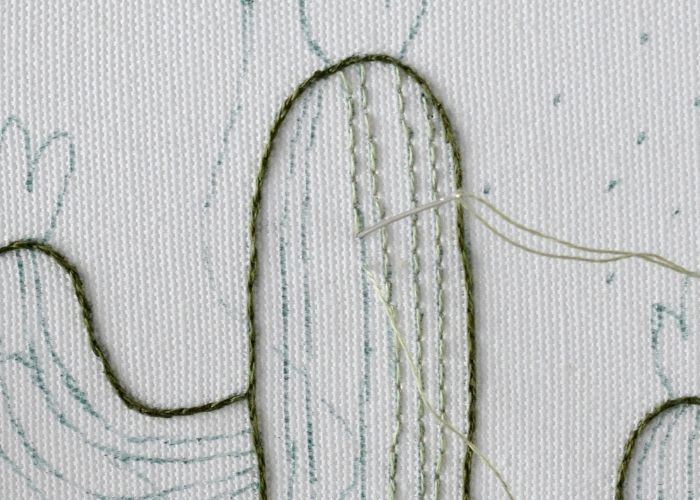
- Backstitch
Embroider all the inner lines on the Cactus with a Backstitch. Use a single strand of embroidery floss.
- Backstitch
You can embroider with a Backstitch in both directions, so do not cut the thread; move up and down and left and right until you embroider all the design lines.
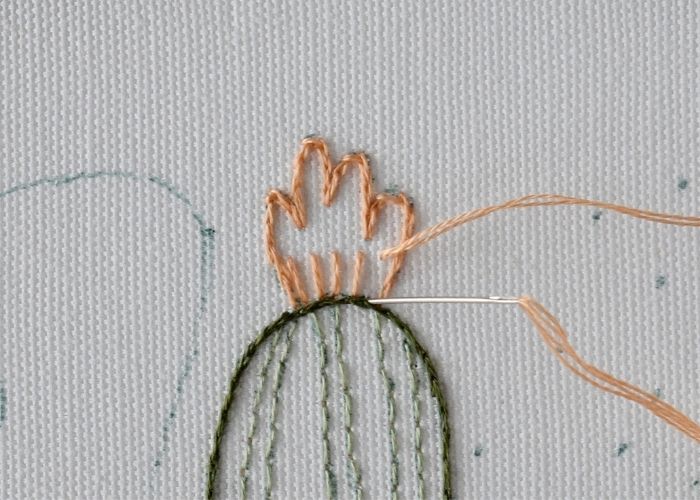
- Long and Short Stitch – outline
First, outline the flowers of the Cactus with a Split Backstitch. This will create a neat border for your Long and Short Stitch.
- Start with guiding lines
Before you start filling, make some guiding stitches that will indicate the direction for the upcoming stitches.
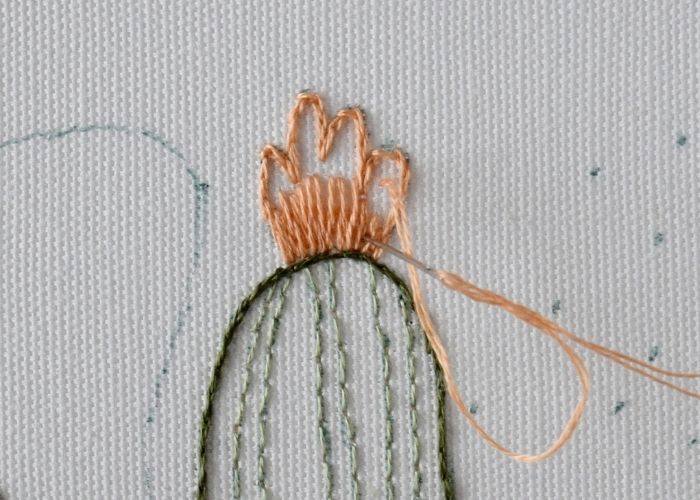
- Rows of Long and Short stitch
Add stitches row after row, till the entire shape is filled.
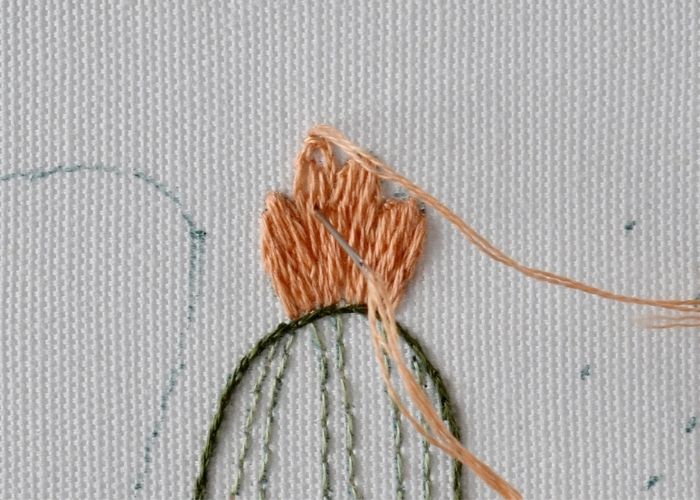
- Carefully fill the edges
Finally, make the stitches that will cover the last pieces of the fabric still visible.
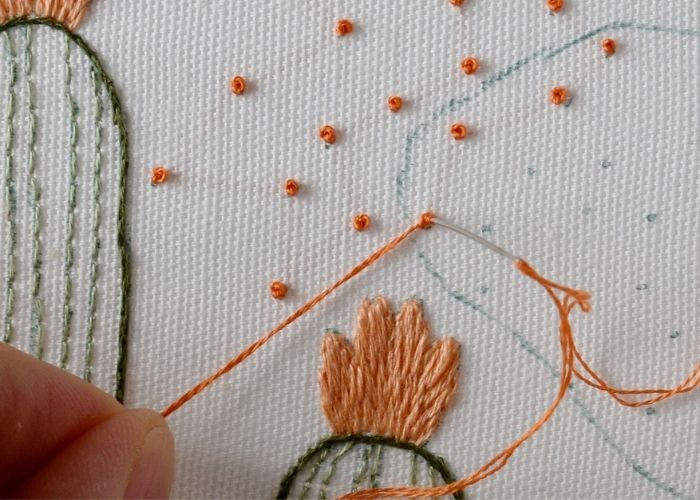
- French Knots
Embroider the cloud of French knots. Twist the thread around the needle twice.
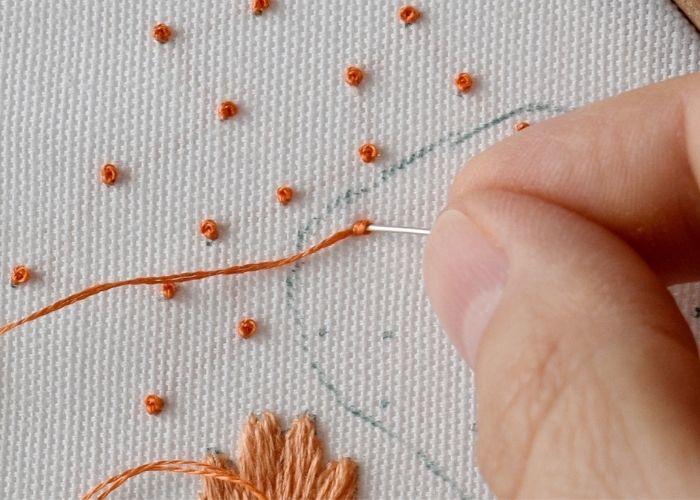
- French knots
Keep the working thread in tension till the last moment.
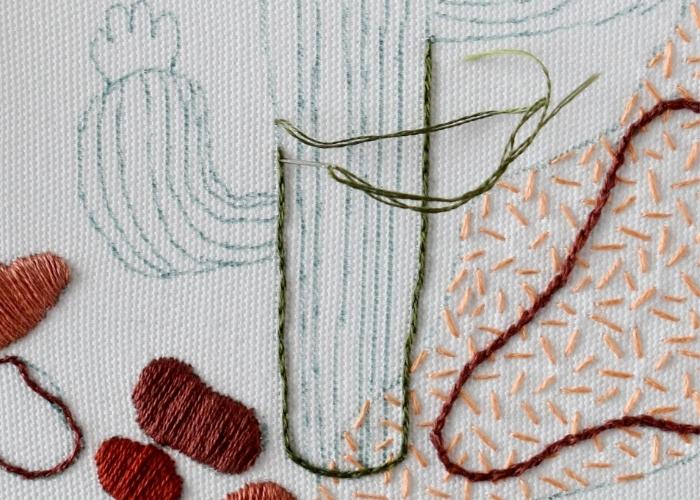
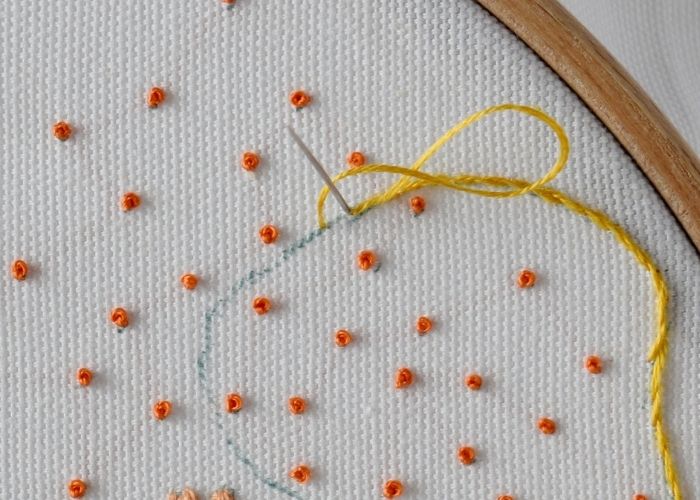
- Stem Stitch
Outline the shape with a Stem Stitch.
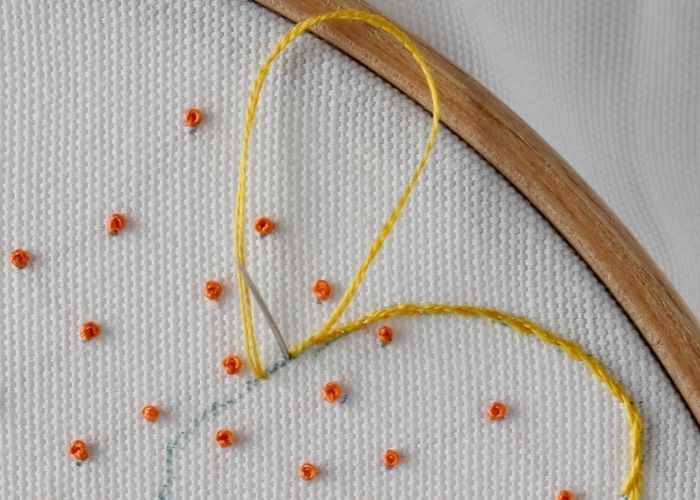
- Stem Stitch
Remember to keep the loop open in the same direction when you move around the shape.
- Seed Stitch
Fill the second shape with a Seed Stitch.

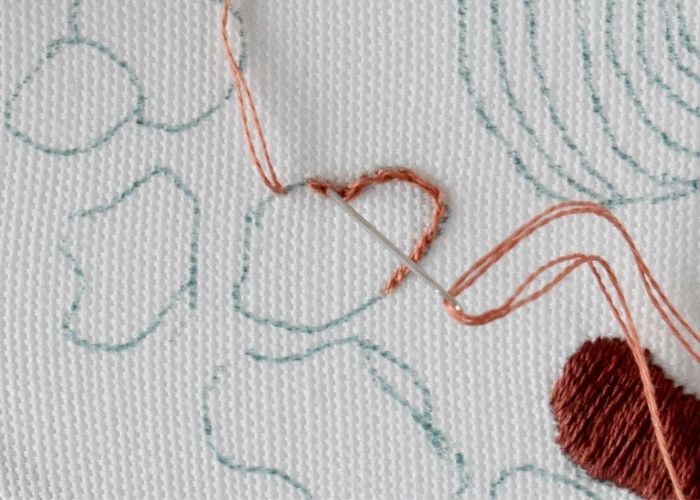
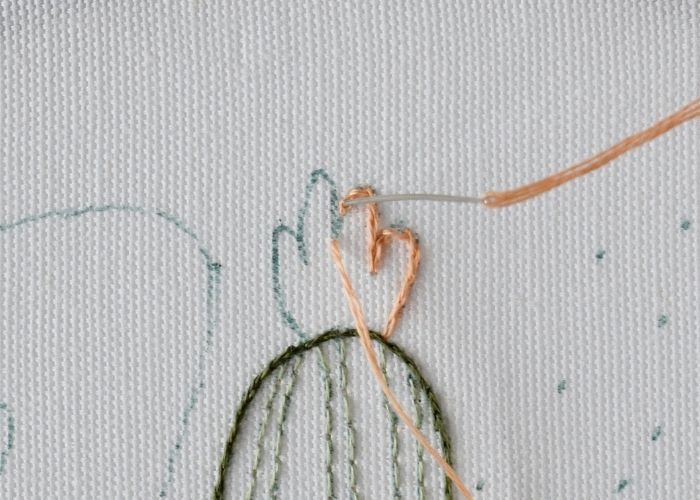
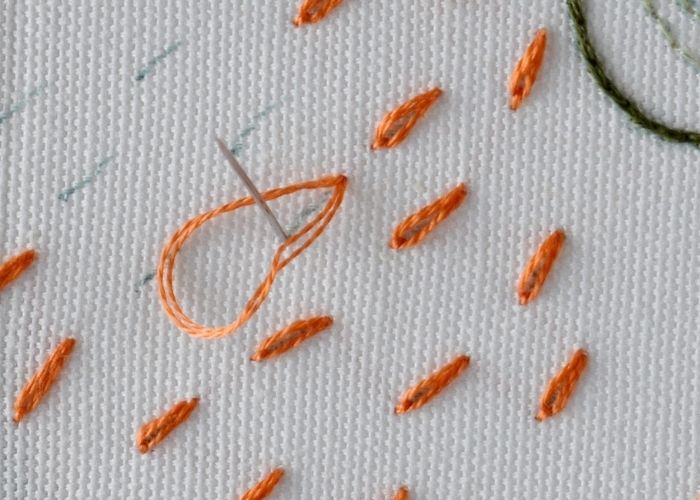
- Detached Chain Stitch
Make a single chain stitch on each line of the design. First, make an open loop.
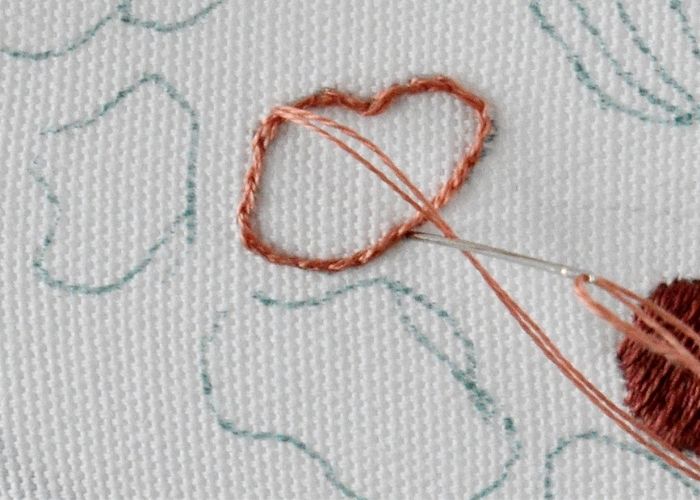
- Detached Chain Stitch
Tighten the loop and add an anchoring stitch.


Video Tutorial
Productos recomendados
Disclaimer. To cover the cost of creating free embroidery patterns and video tutorials for this blog, I do sometimes link to products. Please assume these links are affiliate links. If you choose to buy through my links then THANK YOU! – it will make it possible for me to keep doing this.


Depende de ti

Este proyecto de bordado con puntadas de bordado para principiantes fue creado para brindarte inspiración y una muestra para aprender y practicar puntadas de bordado a mano para principiantes con un diseño divertido que luego puedes usar para crear algo útil y práctico.
Tómate tu tiempo y no te apresures a terminar el diseño de Cactus en un día. ¡Dale un tiempo a cada técnica y no busques la perfección! Solo largas horas de práctica y paciencia conducirán a puntadas limpias.
If you wish to frame this embroidered Cactus in a hoop and use it as a wall decor – read the article “How to Frame Embroidery in a Hoop: Six Methods of Finishing the Back of the Hoop” and I’m sure you will find a method that suites your needs.
Más sobre el bordado a mano para principiantes

Materiales de bordado para principiantes. Todo lo que necesitas para empezar a aprender a bordar a mano

Conceptos básicos del bordado a mano: una guía para principiantes sobre la costura
